 Apprenticeships
 Construction
 Education Tech
 Engineering
 Franchise Networks
 Legal Firms
 Logistics
 MATs
MATs Recruitment
 Retail
 Seasonal Staff
FrogLMS Community
Managing Users and Groups
The aim of this site is to introduce Administrators to Managing Users and Groups, explain how users and classes are setup in FrogLMS.
- Managing Users and Groups – Overview
- Managing Users – Users Application
- Managing Groups – Groups & Policies Application
- Login As User – Login as Another User
- Community Guides – Guidance on deleting ePortfolios

Managing Users and Groups: Managing Users
The Users Application
Probably the area admins will use most will be the Users app. This Frog application allows you to create and edit users individually or en-masse via CSV import.
Frog3 / FrogLearn schools will continue to use Frog3 to manage their users, so this area may seem a little restrictive. That’s not the case for FrogLearn only schools.
To edit an individual:
- Use the Search to narrow down the list of users. The Search function looks at forenames, surnames and usernames. If you search for a general term, one which appears in lots of accounts, the list will appear incomplete. That’s because the Users app uses an infinite scroll, which speeds up most searches. Scrolling to the bottom of the list triggers a second wave of searching.
If you use the Select function, the Select All option will select all possible results, without you having to scroll to the bottom of the list.
- Returning to our search for an individual, once you have located the user, click on their row. The app switches to a profile section containing their details. From here, clicking on the Edit button, you can update:
- Their name, profile, photo and user drive in Basic Information
- How they log into Frog in the Authentication section. If the user is not using Frog for authentication, you can use this section to temporarily log in as that user by switching the Authentication method to Frog and changing the password. If you do do this, it’s often best to login as the user using Incognito or Inprivate browsing mode as this allows you to be logged into Frog in two windows with difference accounts. As soon as you are logged in, you can reset the authentication method.
- Additional information contains the information such as the MIS ID and student UPN or pupil number. If you are using Google with Frog, this section should also contain the student’s Google ID, so that Frog’s assignment system can share documents.
- Group Membership contains all the groups a student is in. Groups in Frog can be classes, year groups, clubs. Classes and Year Groups are set by the MIS import, but classes can be created in the Groups & Policies app. Students can be added here or in the Groups app
- Relationships are also set by the MIS but can be added to here. The MIS Import does reset this data. The Parental Responsibility checkbox links the parent account to the child account for Frog. If this is unticked, parents cannot see information about their child
- Student Contextual Data is designed mainly with FrogProgress in mind, as that system can report on specific groups, such as Pupil Premium or Service Children.
- When you’re happy with the changes you’ve made, click Save.
You can clear a search by clicking the X in the search box.
Groups of users
While all of the above data can be altered on an individual basis, it’s much more likely that you will want to make changes to large groups or profiles. The Users app can export all users or all users in a profile as a CSV.
This allows to you edit results in a spreadsheet and then reimport them. You can alter pretty much any element, although you do need to keep the first column, the UUID field, so that Frog can match up the new data to an existing user.
The Import Wizard talks you through importing users and allows you to map fields from the spreadsheet to specific fields in Frog.
The Validation section of the wizard prevents import if the fields do not match the criteria.
As stated previously, the only field which must remain unaltered when editing via a spreadsheet is Frog’s UUID field. For new users, you would leave this blank.
You can set passwords if Frog is the authentication both individually and for groups, however we recommend using the Forgot password? Link on the login page as a method of distributing login details to parents.
One column I’ve not yet mentioned in the Users app is the MIS column. This highlights which accounts have been created and linked to your MIS system. You cannot edit some fields in Frog, such as names and classes for these accounts. This is because these fields are controlled by the MIS import.
New Learners
When new learners join the school, you will most likely have a request to grant them access to Frog before they officially start. This means that when they do start, the MIS will create a separate account for them. You can transfer the MIS link from their automatically created account to their pre-start account using the Action Cog when viewing the details of the MIS tagged account.
Leavers
When someone leaves, their Frog account will remain active, but the MIS link will disappear. This will mean you need to do some end-of-year housekeeping to clear off leavers, but we have a guide on the Community for this... Housekeeping Guide
To remove users, there are three options:
- Setting Account Status to Off. This is useful for temporarily removing users from being able to log in and showing up in searches in assignments, groups & policies and timelines etc... If users are likely to return to your school, Account Status is the best method to use.
- Archive – effectively deletes the User from being visible in Frog. Their details are retained, but they are hidden. This can be undone by Frog’s service desk.
- Anonymise and Forget – to comply with the General Data Protection Regulation or GDPR, this setting deletes any connection in Frog’s databases between a specific individual and anything connected to their user account. Sites created, homeworks set etc... will remain, but there will be no record of the connection to the named person. Use with caution, as it cannot be undone for obvious reasons.
Managing Users and Groups: Managing Groups
The Groups and Policies application, as the name suggests, allows you to manage both groups and their access.
MIS data will automatically create groups in Frog. You cannot add or remove users from these groups as they are sync-ed with your MIS.
You can create new groups as well as editing all groups’ permissions within Frog. You can also edit permissions assigned to profiles.
All users in Frog must be attached to one of six profile types, ignoring FrogConnect for now. They can either be:
- A Student
- A Staff user – which is teachers and support/associate staff
- A Parent
- A Governor
- An Admin – usually the school’s IT support staff
- Or An Other
Each Profile type can have their own set of dashboards. These users can then be assigned to Groups, to give you greater gradation and control.
Most permissions within Frog are available to be altered using the Groups and Policies, although some elements are hard-coded. For instance, you cannot assign work to a staff user, only to a student profile. This option is not available to change.
Only administrators can alter permissions, using the Policy section.
To edit the Staff profile, for example:
- Search for ‘Staff’ in the search box
- Profiles appear highlighted in orange.
- Single-click on the Staff row. You might need patience here, as Frog loads in all users and this can take a few moments, depending on the size of the group.
- Once loaded, initially I can browse and search through the list of users and their policies, but I cannot alter anything until I click Edit
- As you can see, because I am editing a profile, I cannot add to amend any Users, so let’s skip to Policies
- I’m going to allow my staff to create Groups – they might use this to make a chess club, or a differentiated class group.
- I could browse through the dropdown lists to find the appropriate policies, or I can search for “group” on both search boxes
- Staff already have the Groups & Policies policy. They can add users to an existing non-MIS group and they can view groups.
- To add additional policies, simply click the toggle to the appropriate item. The Question Mark icons give you a bit more information.
It’s up to you as admins, but I always recommend working through the list of widgets staff can see in the editing panel. The majority of teachers are only going to build teaching resources, so they don’t need a lot of the available widgets. You can clear space by turning off the more admin-orientated tools, such as the Assignment Calendar widget and the Create Event widget.
Staff can still use these widgets in a page, but you should consider hiding them from the widget panel.
When you’re ready, click Save to save your changes and leave the editor.
To create a group:
- Click on the New Group button
- Give your group a name
- Select a group type. You’ll most likely be creating clubs or job roles from the available options.
- Click Save
The Groups app will refresh with the new group selected. Click the edit button to start making changes.
You can now search for individuals to add to your group. Clicking on the list on the right, will transfer them into the group. You can choose to set a leader, this will allow this group to show up for the teacher when setting an assignment.
You don’t have to add users in this fashion, once created, you could add users en-masse using a CSV import in the Users app. To do this:
- Export the users in as a CSV to ensure you have their UUID.
- Add the new group to their row – you can remove everyone else at this point
- Upload the CSV back into the Users app.
Imagine this group is an after-school coders club. The teacher has requested these students have access to the HTML widget. This is not something you should do lightly, but it’s a useful way to highlight how policies interact with each other.
- Click on the Policy tab, you’ll notice there are no Policies for this group. The users inherit their policies from the profile.
- Search for ‘HTML’
- Click on the plus sign in the HTML widget row.
- There is now a policy for this widget for this group, but by default, it is turned off.
- Click the toggle to turn on the HTML widget
- Click Save
Users in this group will now be able to see the HTML widget in the editing panel next time they log into Frog.
To determine which policies override which, we can use the Prioritise function. Clicking on this screen shows all the groups with specific policies. Whichever group is at the top sets the permission.
For example, on this platform I have a group called “Not allowed to use HTML’ and Mr Smith is in the group. There is a policy attached to this group turning off the HTML widget, but Mr Smith was also in the group we have just created. And if I click on the Prioritise screen, I can see that our new group is above the Not allowed group. I can drag the ‘Not Allowed’ row above the coders club and now Mr Smith will no longer have access to this widget.
I can verify this, using the Troubleshoot screen. Here I can search for any user and discover what access they have. Here is Mr Smith. I can see he is in 3 groups. And if I click on the widgets section and scroll down to the HTML widget, I can see his access is blocked. Clicking on the Information icon shows me that as a staff profile, there is a policy blocking his access, but the coding club allows it and the Not allowed group overrules this. I could then change the order in the Prioritise section or remove Mr Smith from the Not allowed group to give him access.
Managing Users and Groups: Login as User
On occasion, you may need to be log into Frog as another user to help solve a problem they are experiencing.
Frog provides a tool for Admins to do this, but it will need to be activated.
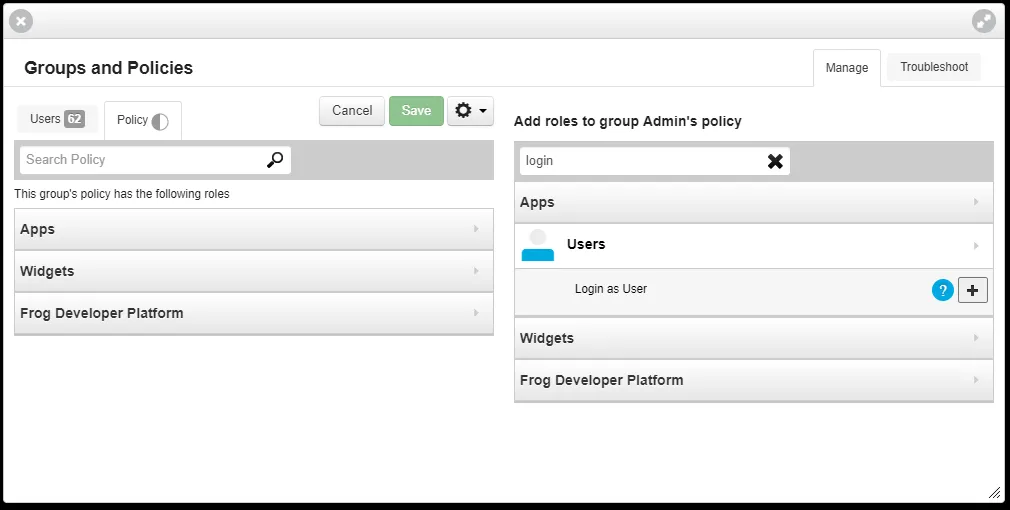
Groups & Policies - activating the role
- Open the Groups & Policies application
- Search for the Admin profile
- Click Edit
- In the right-hand column, search for 'Login', or expand Apps, then expand Users.
- The role Login as User will appear.
- Click the Plus button
- The Users app section and role will load into the left-hand column, with the role for Login as User set to off.
- Check the toggle switch to On
- Click Save
- Refresh Frog
If the role is not visible in the right-hand column, it may have already been added to the left-hand current roles
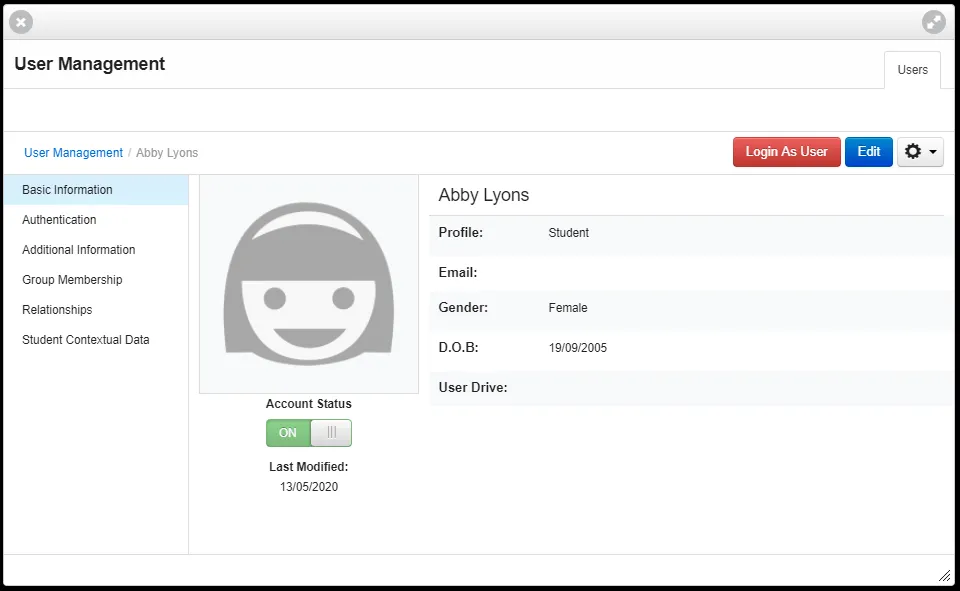
Users application - logging in as a user
- Open the Users app
- Search for a user
- Click on the user to view their information
- Click on the red Login as User button
- Your browser will reload, logged in as the user you have selected.
- To revert to your own account, you will need to log out and log in again as normal.
Things to note
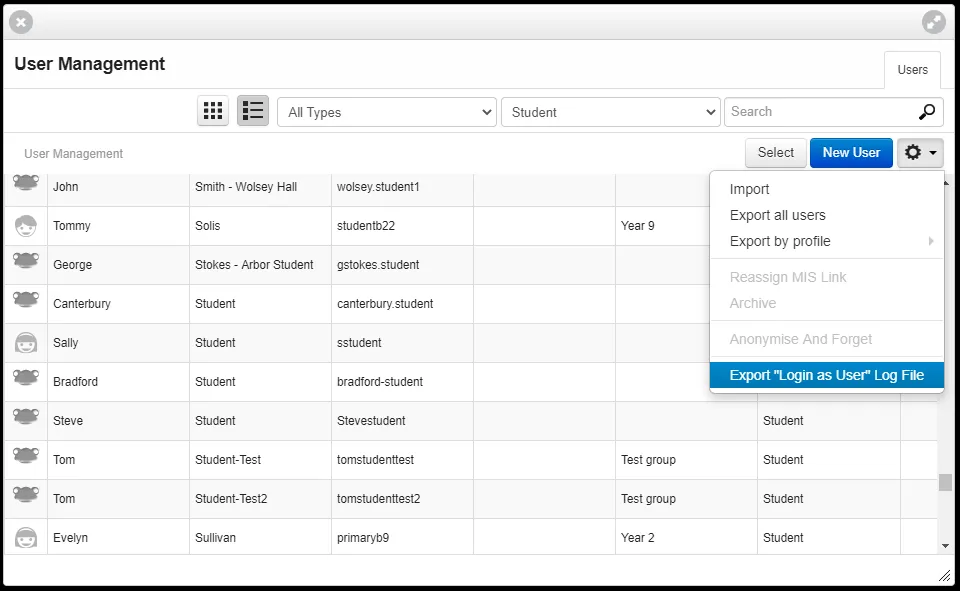
For peace of mind, due to fears of potential misuse of this feature, a record is kept of every use. This "login as User" Log file can be exported from the Action Cog in the Users application.
If you do not see the red "Login as User" button, this means that user has never logged into Frog.